

Look, we are all aware that maintaining a home can...
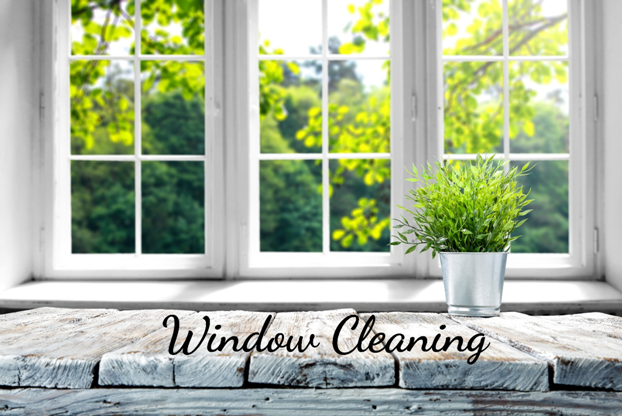
How To Clean Windows Like A Pro
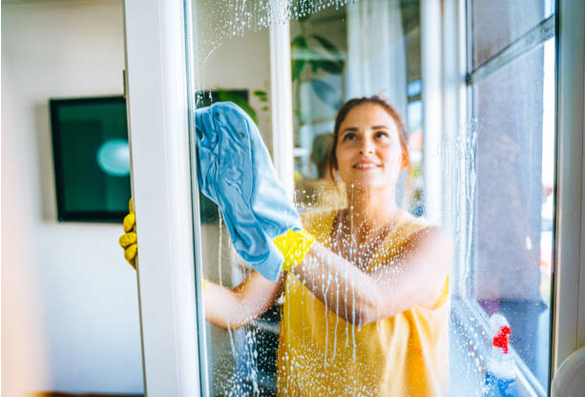
Look, windows function like the face of your house; they are the first thing people see, and they allow all that natural light to pass through, which is a plus. When they’re dirty, though, it makes the whole thing feel sort of dull and depressing. Fortunately, that doesn’t mean you need to call in the pros—you can do this yourself, and that saves a fair bit of money.
If you are new to the habit, it may be a bit awkward, and you’ll probably leave some streaks as you go along, but honestly, once you get good with the system, there’s something weirdly satisfying about seeing those windows sparkle.
See our detailed window cleaning guide for more tips and tricks. So if you’re ready to learn how to clean windows properly, keep reading because we’re going to walk through the whole process.

Why clean windows matter more than you think
Clean windows aren’t just about appearance, which is certainly a part of it. When your windows are not clean, they block way more light than you’d imagine, and this means you’re turning on lights in the daytime, which drives your power bill higher. Not ideal. Here’s what you’re actually up against.
- Grimy windows can block up to 40 per cent of the natural light entering your home and cause forced usage of artificial lighting.
- Bacteria and allergens accumulated on dirty glass can cause respiratory problems, particularly for people with asthma.
- Dirt and grime cause tiny scratches over time, weakening the glass and leading to cracks.
- The risk of less visibility through dirty glass is a real safety hazard that you need to look out for, whether you inspect your property or simply want to take advantage of the view.
The energy bills multiply rapidly, and the health concerns are real. And over time you’re facing the bills for expensive window replacements if that dirt continues to scratch the glass. You are working on keeping your home clean but also need to consider that windows aren’t the only area that needs attention – you should also look at the 5 dirtiest spots in your home to guarantee that you aren’t overlooking other hotspots of bacteria.

What you’ll need to get started
Most people hate window cleaning—that’s for sure. But then again, it is one of those things that just needs doing. You wouldn’t eat off dirty plates, right? The same logic applies here.
You’re going to want a couple of things:
- Window cleaner—Windex works well enough, or any decent brand really.
- Soft scrubber or sponge for scrubbing itself.
- Window cleaning brush if you have one.
- Microfibre cloths – these are your best friend for this job, WAY better than paper towels.
- Paper towels for extra drying.
- A squeegee with a long handle is pretty much a must-have, especially with higher windows.
- Bucket for warm water.
- Rubber gloves to protect your hands from that cleaning solution.
- Old toothbrush for getting into corners and tight spots.
- Vacuum with crevice tool attachment for cobwebs.
- Soft-bristled broom or dust brush for sweeping cobwebs.
Simple stuff really, but just getting everything out there before you start will definitely make the whole process go faster.

Getting set up properly
Before you start to scrub away, you need to set things in order, or you’ll just make more work for yourself. Here’s what to do first.
Ladder safety
If you are going to do high windows, ensure your ladder is properly set up before you dive in. And, of course, you should also see that whatever ladder you are using is actually stable and tall enough; wobbly ladders are how people end up in hospital, which is obviously not the point here.
Put it flat on the ground and check whether the feet are locked properly. If it’s leaning against a wall, ensure the wall provides stable support.
Safety experts recommend that ladders should always be set up on flat, stable surfaces and you should keep three points of contact as you climb. Therefore, when climbing, it would be ideal to take an extra minute and ensure that everything is perfectly secure.
Protect your stuff
You’ll also want to protect the area around your windows because cleaning solution drips everywhere, and you don’t want to ruin your furniture or kill your plants. Old sheets or towels work fine for covering furniture; just make sure they’re secured so they don’t slip off. For plants, either move them out of the room or place a plastic bag over them temporarily.
Have supplies ready
And this might seem obvious, but get all your supplies within reach before you climb up that ladder. Nothing is worse than getting halfway up and realising you forgot the squeegee.

Dealing with cobwebs first
Right, so before you start actually washing anything, you need to get rid of cobwebs and loose dirt. Grab your soft-bristled broom or dust brush and gently sweep away any cobwebs. Be careful not to scratch the glass because that’s permanent damage. Then use your vacuum with the crevice attachment to suck up whatever’s left. This step makes the actual cleaning so much easier, trust me.

Cleaning ground floor windows
Ground-floor windows are straightforward, and this is where most people should start to get comfortable with the process. The lower windows are easier to access, and you can take your time deciding the best method without worrying about ladder safety. Here’s the process:
- Fill your bucket with warm water and add a few squirts of window cleaner.
- Take your scrubber or sponge, dip it in the solution, and start scrubbing from the top, working your way down. Make sure you get into all the corners and edges where dirt loves to hide.
- Rinse off the window with clean water.
- Wipe it dry with a cloth or paper towel.
- Use the squeegee starting at the top and pull it down in a straight line; wipe the blade after each pass with a clean cloth.
- Do the same thing on the other side of the window.
- Don’t forget to wipe down the frame and windowsill to get rid of any leftover dirt or solution.
Once you get into a rhythm, the entire process is going to be 5-10 minutes per window. Streaks are common the first couple of times; you will master the squeegee technique very fast, and before you know it, the windows will be gleaming.

The higher windows are trickier
Upper-level windows are basically the same process, but you need your ladder, which makes it a bit more complicated. Safety first, though; make sure that ladder’s secure before you climb up. You’ll want a long-handled squeegee or window brush for these ones because reaching and stretching while you’re on a ladder is asking for trouble.
Follow the same process as the lower windows: scrub with your solution, starting from the top and working down, rinse with clean water, dry it off and squeegee away the excess water and streaks. Just take your time up there and don’t rush it because rushing on ladders never ends well.

Don’t forget the screens
Fly screens are one of those things people frequently miss, but they are just as dirty as the windows themselves. Remove them from the frames; normally you just lift them up and out. Shake them first to clear away loose dirt and debris.
Wipe down the frames with a sponge, and if there is stuck-on grime, apply some cleaning solution to loosen it up. Scrub the actual screens with your sponge. If they’re really dirty, you might need that cleaning solution with warm water to get them properly clean.
Let everything dry completely before you put the screens back in the frames. It’s worth doing this every few months, especially if you live somewhere dusty.

Getting into those awkward spots
There are always corners and edges that are hard to reach. Use your vacuum and crevice tool to get loose dirt out, then scrub stubborn grime away with that old toothbrush. The bristles really work well for tight spaces.
If there’s something really stuck to it, mix some window cleaner or mild soap with water and apply it with a cloth or sponge. Then use a dry cloth to wipe away the excess cleaner and avoid streaks.

The final touches matter
Once you’ve finished the main cleaning, a few finishing touches will make your windows look professional. Use a microfibre cloth or a squeegee to take care of any water or streaks you may have overlooked. Dry the windowsills properly, as moisture left sitting there can lead to mould and mildew.
For hard water stains, a vinegar and water mix will remove them effectively. Check out our guide on natural remedies for stains, spills and smells. And if you’re working outside, pick up a leaf blower or small broom to clean out any debris from the frames and sills.
Keeping windows clean longer
After all that effort, you’ll want them to stay clean as long as possible. When the windows are completely dry, you can apply a window sealant or protectant that helps repel water and dirt. This makes them easier to clean next time around, which is always appreciated.
Get into a regular habit of dusting and vacuuming your window frames and sills to stop dirt building up. When you notice any cracks or chips, get them fixed quickly because they’ll only get worse and cost more later. Establish a cleaning plan for yourself—once a month or every few weeks, depending on where you live and how dirty they get—to clean the window frames and sills.
At the end of the day, cleaning windows properly takes some work and effort, but it is 100% doable, and the difference it makes to your home is substantial. Just work your way through the steps systematically; don’t rush it. You’ll get sparkling clean windows that allow in that lovely natural light. Worth the effort for sure.
For more details on window cleaning, check out our window cleaning guide. And if you’d rather leave that to specialists or need help with those hard-to-reach windows, contact Perth Home Cleaners.
Related Posts


Clean windows can have a huge impact on the overall...

When was the last time anyone decided to clean their...
There's something about sparking windows and the beautiful aesthetic it...

Well-maintained furniture transforms a room.Whether it’s a leather sofa...